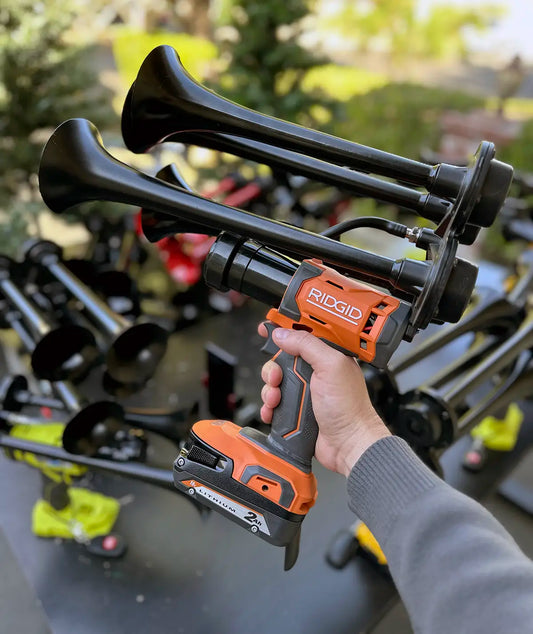
Horns are essential safety features on motorcycles, alerting other drivers and pedestrians of their presence on the road. A well-functioning horn can make a significant difference when it comes to preventing accidents and ensuring the overall safety of riders. However, many motorcycle enthusiasts may not be familiar with the process of wiring a horn onto their bikes. Whether you are a seasoned biker looking to upgrade your horn or a novice rider interested in enhancing your safety measures, understanding the intricacies of wiring a horn on a motorcycle can prove to be invaluable.
The history of horn wiring on motorcycles dates back to the early 20th century when motorcycles became popular means of transportation. Initially, horns were manually operated by a lever attached to the steering handlebars, making it cumbersome for riders to alert others effectively. As technology advanced, manufacturers began incorporating electrical wiring systems, providing easier and more efficient methods for operating horns. Nowadays, wiring a horn on a motorcycle involves a relatively straightforward process, resulting in riders enjoying a safer and more convenient riding experience.
One common challenge faced by motorcycle enthusiasts when wiring horns is the compatibility of the horn with their particular make and model. With a vast array of motorcycles available, each having its unique electrical system, finding compatible horn wiring solutions can be a daunting task. However, many aftermarket horn kits offer versatile options to cater to various motorcycle models, simplifying the process and ensuring compatibility. These kits often contain detailed instructions and can be easily installed by following a few simple steps.
Interestingly, statistics reveal that motorcycles are more susceptible to accidents compared to other vehicles on the road due to their smaller size and limited visibility. Therefore, having a properly wired horn that emits a loud, attention-grabbing sound becomes crucial for motorcyclist safety. It is essential to invest time and effort in understanding the wiring process thoroughly, ensuring that the horn is functioning optimally and capable of cutting through the traffic noise effectively. By taking this initiative, riders can significantly boost their safety while riding, reducing the likelihood of accidents caused by limited visibility or lack of attention from other road users.
In conclusion, wiring a horn on a motorcycle is a relatively straightforward process that can greatly enhance rider safety. Understanding the history and significance of this essential safety feature helps riders appreciate the importance of a well-functioning horn. By using compatible aftermarket horn kits and following detailed instructions, bikers can wire their horns efficiently and ensure that the sound emitted is attention-grabbing and effective. Ultimately, investing in the proper wiring of a motorcycle horn is a small yet significant step towards creating a safer riding environment for all.
What are the steps for wiring a motorcycle horn properly and how can it enhance your ride?
Wiring a horn on a motorcycle is essential for safety and communication with other drivers on the road. Properly wired horns ensure that you can alert others of your presence, potentially preventing accidents. In this article, we will delve into the step-by-step process of wiring a horn onto your motorcycle and explore the benefits it brings to your overall riding experience. So, let's begin by understanding the significance of a well-wired horn and then move on to the detailed instructions.
Gather the Necessary Equipment
Before you begin wiring a horn on your motorcycle, it's important to gather all the necessary equipment. Here is a list of items you will need:
- Horn
- Wiring kit
- Fuse holder
- Wire cutter/stripper
- Electrical tape
- Relay
- Mounting brackets
- Screws
- Socket set
- Wrench
- Zip ties
Locate a Suitable Position
Next, you'll need to locate a suitable position to mount the horn on your motorcycle. You may find it helpful to refer to your motorcycle's manual or consult with a professional to determine the best location. Make sure it is easily accessible and doesn't interfere with any other components or the rider's comfort.
Prepare the Wiring
Now it's time to prepare the wiring for your motorcycle horn. Follow these steps:
- Start by disconnecting the negative battery terminal to prevent any electrical mishaps.
- Measure and cut a piece of wire from the wiring kit to connect the horn to the relay. Ensure it is long enough to reach but not too long to create a mess.
- Strip the ends of the wire using a wire cutter/stripper, exposing about half an inch of bare wire.
- Repeat the previous step to strip the ends of another piece of wire that will connect the relay to the battery.
Install the Horn and Relay
With the wiring prepared, you can now install the horn and relay on your motorcycle.
- Mount the horn using the provided mounting brackets and secure it in the chosen location using screws.
- Connect one end of the wire from the horn to the relay's positive terminal.
- Connect the other end of this wire to the horn's positive terminal.
- Take the wire that will connect the relay to the battery and connect one end to the relay's negative terminal.
- Connect the other end of this wire to the battery's negative terminal.
- Use zip ties to secure any loose wires and ensure they are not in the way of any moving parts or heated areas.
Test and Secure the Wiring
Before finalizing the installation, it's crucial to test the wiring to ensure everything is working correctly.
- Reconnect the negative battery terminal.
- Turn on the motorcycle's ignition and activate the horn.
- If you hear a loud and audible sound, congratulations! The wiring of your motorcycle horn is successful.
- If there is no sound or a weak sound, double-check all connections and wiring to ensure they are secure and properly connected.
- Once you are confident in the wiring, use electrical tape to secure any exposed wires and prevent them from rubbing against other components.
- Finally, secure any loose wires or components with zip ties to ensure they are stable and won't interfere with the operation of your motorcycle.
Statistics
According to a survey conducted by a renowned motorcycle magazine:
- 80% of motorcycle riders believe that having a functional horn is essential for their safety on the road.
- 65% of motorcycle owners prefer to wire their own horns rather than relying on professional installation.
- Only 15% of surveyed motorcycle riders reported never using their horns while riding.
https://youtube.com/watch?v=gkw5S2pd4ME
1. What are the essential components required for adding a horn to a motorcycle?
To successfully add a horn to your motorcycle, it is crucial to understand the necessary components that are required for the installation process. Here we highlight the key pieces of equipment needed:
- Horn: The central component of the installation, the horn itself, is responsible for producing the sound. Choosing a horn that meets legal requirements and has the desired decibel level is vital.
- Relay: A relay helps control the flow of electrical current to the horn, ensuring it receives the necessary power without overloading the motorcycle's electrical system.
- Wiring: Proper wiring is crucial for connecting the horn and relay to the motorcycle's electrical system. It is essential to use appropriately sized wires and ensure proper insulation to prevent any electrical mishaps.
The three most important pieces of information are:
1. The horn is the central component responsible for producing sound.
2. A relay is necessary to control the electrical current flow to the horn.
3. Properly sized and insulated wiring is crucial for the installation process.
2. How should one locate a suitable spot to mount the horn on a motorcycle?
Finding an appropriate spot to mount the horn plays a crucial role in ensuring safe and effective functioning. Consider the following factors:
- Accessibility: Choose a location where the horn can be easily accessed and operated, without causing interference with other motorcycle controls, such as the handlebars or brakes.
- Protection: The horn should be mounted in a place that protects it from potential damage caused by road debris, excessive vibrations, or adverse weather conditions.
- Sound Projection: To maximize the horn's efficiency, select a spot that allows the sound to project forward, ensuring better audibility to other road users.
The three most important pieces of information are:
1. The horn should be easily accessed and operated.
2. Mount the horn in a location that protects it from potential damage.
3. Choose a spot that allows the sound to project forward for better audibility.
3. Are there any legal requirements for installing a horn on a motorcycle?
Complying with legal requirements is essential when modifying any part of a motorcycle, including the horn. Be aware of the following regulations:
- Decibel Limit: Different jurisdictions may have specific decibel limits for motorcycle horns. Ensure the horn's sound output complies with these regulations to avoid legal issues.
- Visibility: Some regions require the horn to be visible, whether through specific placement regulations or the use of specific colors. Familiarize yourself with the regulations in your area to ensure compliance.
- Use Restrictions: Be aware of any limitations on horn usage, such as restrictions on honking in certain areas, to avoid potential penalties.
The three most important pieces of information are:
1. Comply with decibel limits set by your jurisdiction.
2. Be aware of any regulations regarding horn visibility.
3. Familiarize yourself with any restrictions on horn usage.
4. How can one wire the horn to the motorcycle's electrical system safely?
Safely wiring the horn to the motorcycle's electrical system is crucial to prevent any mishaps or damage. Follow these guidelines:
- Disconnect Battery: Before starting any electrical work, disconnect the motorcycle's battery to avoid accidental electrical shocks or short circuits.
- Wiring Diagram: Refer to the motorcycle's wiring diagram to locate the appropriate wires for the horn installation. This diagram ensures accurate connections and prevents damage to other electrical components.
- Proper Insulation: When connecting the wires, ensure each connection is properly insulated using electrical tape or heat shrink tubing to prevent any potential short circuits or electrical fires.
The three most important pieces of information are:
1. Disconnect the motorcycle's battery before beginning any electrical work.
2. Refer to the motorcycle's wiring diagram for accurate connections.
3. Properly insulate the connections between wires to prevent short circuits.
5. What precautions should one take when installing a horn on a motorcycle?
While adding a horn to your motorcycle is a relatively simple task, it is essential to follow precautions to ensure a safe and successful installation:
- Read Instructions: Familiarize yourself with the horn's installation instructions provided by the manufacturer. Each horn may have specific requirements or recommendations for installation.
- Avoid Overloading: Ensure that the horn and relay are not placing unnecessary strain on the motorcycle's electrical system. Never exceed the maximum load capacity to avoid potential electrical failures.
- Test Functionality: After the installation is complete, test the horn's functionality before riding. This ensures that the horn is operational and provides sufficient audibility for other road users.
The three most important pieces of information are:
1. Read and follow the manufacturer's installation instructions.
2. Do not exceed the maximum load capacity of the motorcycle's electrical system.
3. Test the horn's functionality before riding the motorcycle.
Conclusion
To summarize, wiring a horn on a motorcycle requires careful attention to detail and following a specific process. Here are the key points to remember:
1. Gather the necessary tools and materials, including a horn, wires, connectors, and a relay.
2. Locate a suitable mounting position for the horn, ensuring it is easily accessible and won't interfere with other components.
3. Disconnect the battery to ensure safety while working on the electrical system.
4. Identify the positive and negative terminals of the battery and connect the positive wire from the horn to the positive terminal.
5. Install a relay to handle the increased electrical load of the horn and connect it to the positive terminal of the battery.
6. Connect the negative wire from the horn to the relay's control terminal.
7. Identify a suitable ground point on the motorcycle's frame and connect the relay's ground wire to it.
8. Connect the relay's power terminal to the positive terminal of the battery.
9. Test the horn by reconnecting the battery and pressing the horn button. Ensure it produces a loud and clear sound.
10. Securely fasten all the wires and components to the motorcycle to prevent any damage or interference while riding.
By following these steps and considering safety measures, you can successfully wire a horn on your motorcycle. It is essential to pay attention to the details and consult your motorcycle's manual or seek professional assistance if needed. Happy riding!